
Introduction
Greetings, dear readers! In today’s blog, we’re about to embark on an exciting journey into the world of iOS app interface manipulation. Our focus will be on enhancing the user interface of iOS applications created with SwiftUI, and we’ll add an extra layer of intrigue by accomplishing this with the powerful Frida tool.
Our primary objectives for this blog are to change the background color and modify text labels dynamically, all achieved through the magic of Frida. By the end of this tutorial, you’ll be equipped with the knowledge and skills to take your iOS app customization to the next level.
Let’s dive in!
Application Code
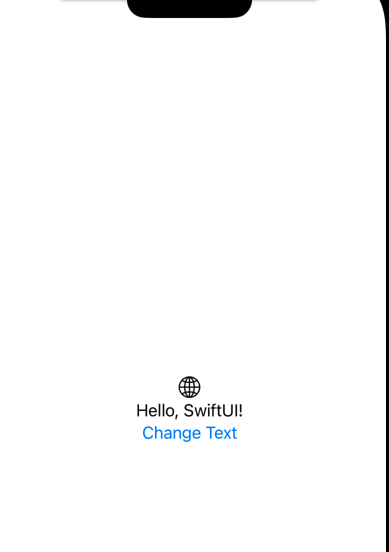
The application’s code is fairly straightforward, and you can locate it right here:
import SwiftUI

struct ContentView: View {
    @State private var greetingText = "Hello, world!"

    func sayHello() {
        greetingText = "Hello, SwiftUI!"
    }

    var body: some View {
        VStack {
            Image(systemName: "globe")
                .imageScale(.large)

            Text(greetingText) // Display the text with the updated value

            Button(action: {
                sayHello() // Call the function when the button is pressed
            }) {
                Text("Change Text")
            }
        }
        .padding()
    }
}

struct ContentView_Previews: PreviewProvider {
    static var previews: some View {
        ContentView()
    }
}
What we’re going to do is, upon pressing the button, we will use Frida to alter both the background color and the text.
Reverse Engineering
In our journey of binary analysis with Hopper, a fascinating discovery emerges when we observe the invocation of the “swift init” method. This revelation paves the way for us to implement a method hook, allowing us to dynamically alter the string’s value.

Frida script
Now it’s time to craft our frida script:
var targetModule= 'TestUI'
    var addr=ptr(0x4108);
    var moduleBase=Module.getBaseAddress(targetModule);
    var targetAddress=moduleBase.add(addr);
    Interceptor.attach(targetAddress,{
        onEnter(args) {
        // Change the memory protection to allow writing
        Memory.protect(args[0], Process.pointerSize, 'rwx');
        // Replace the string argument with "hacked"
        Memory.writeUtf8String(args[0], 'hacked');
        // Print the modified argument
        const strArg = Memory.readUtf8String(args[0]);
        console.log('String argument (modified):', strArg);
        // Bonus change the color of background
        ObjC.chooseSync(ObjC.classes.UIView).forEach(element => {
            // Get the UIColor class
            const UIColor = ObjC.classes.UIColor;

            // Create a yellow color
            const yellowColor = UIColor.yellowColor();

            // Set the background color to yellow
            element.setBackgroundColor_(yellowColor);

        });


    }
});
The final stage involves running the script, and if the process unfolds smoothly, we successfully modify both the background color and the text. If you have any queries or need assistance, don’t hesitate to reach out to me.
Conclusion:
In this blog, we’ve explored the fascinating realm of iOS app interface manipulation with the powerful Frida tool, combined with SwiftUI. We’ve demonstrated how to change the background color to enhance the visual appeal of your app and how to dynamically modify text labels to interact effectively with users.
By mastering these techniques, you’ll have the power to create captivating, dynamic, and visually stunning iOS applications that leave a lasting impression. Happy coding with Frida!